Product page widgets
Cross-sell
The Cross-sell widget renders complementary product recommendations on product pages — typically below the buy button or product description. It's the highest-traffic surface in your store, and the right cross-sell here lifts AOV without disrupting the buying flow.
Three layouts ship out of the box. Pick the one that matches your product page density, mobile traffic share and how many products you want visible at once. You can switch layouts later on the Design tab.
Layouts
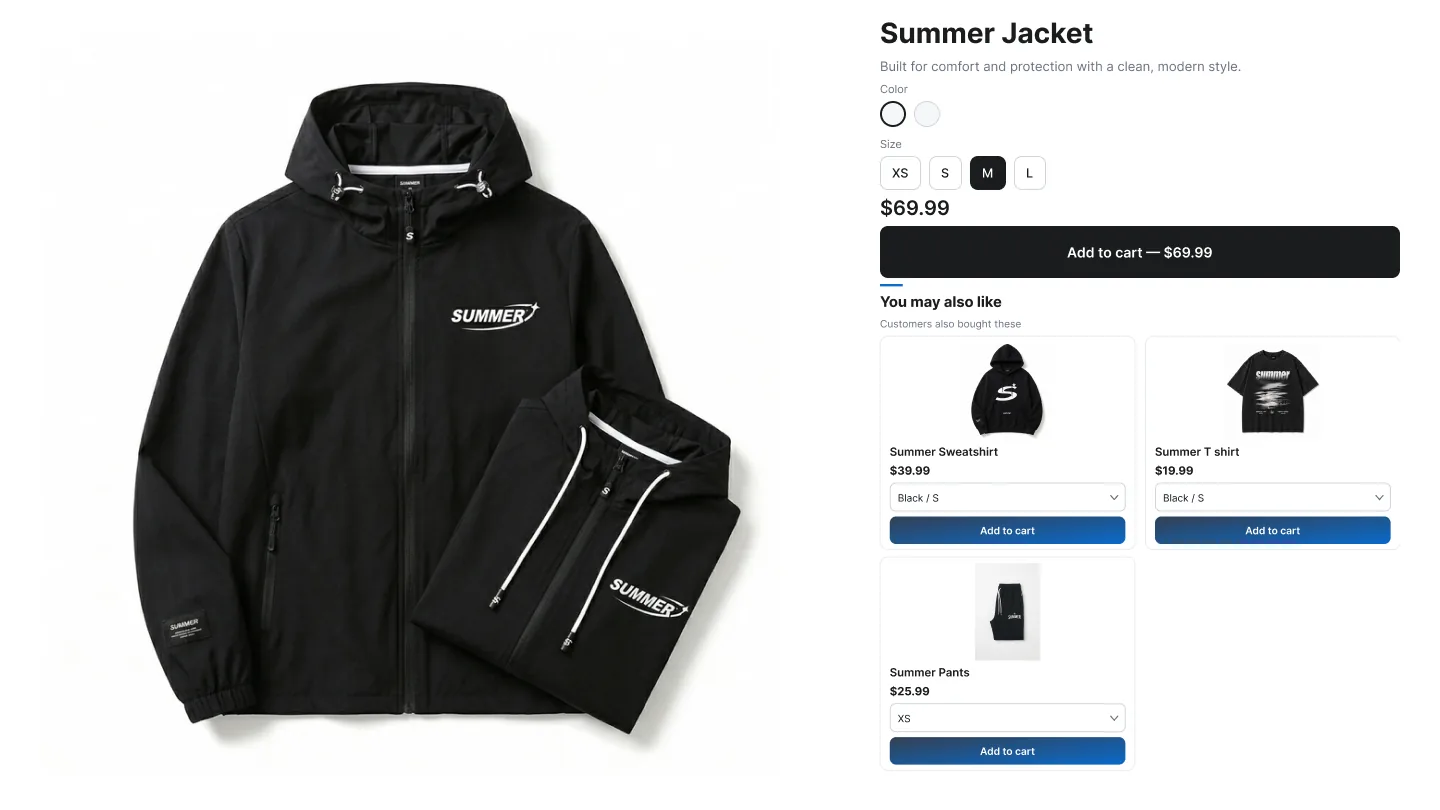
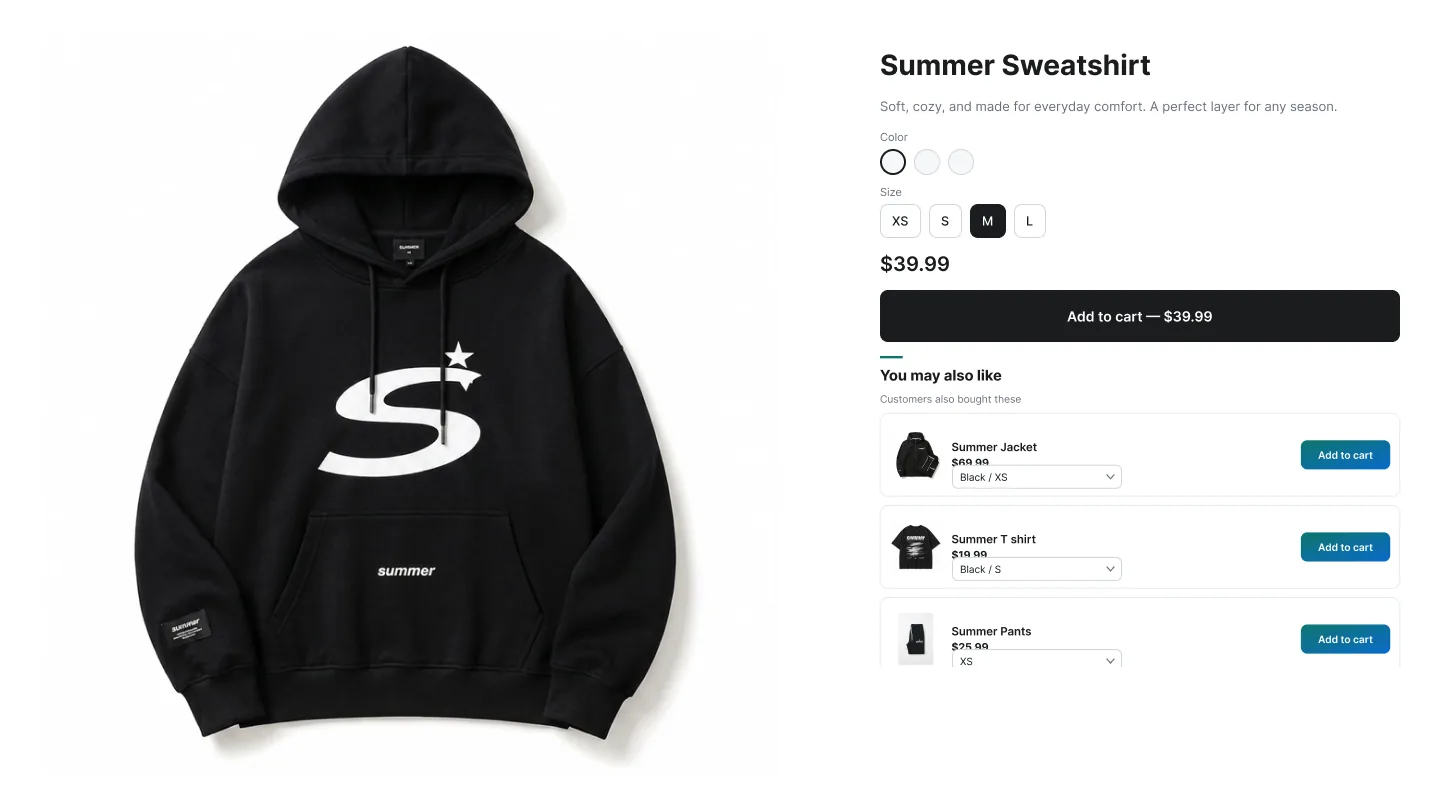
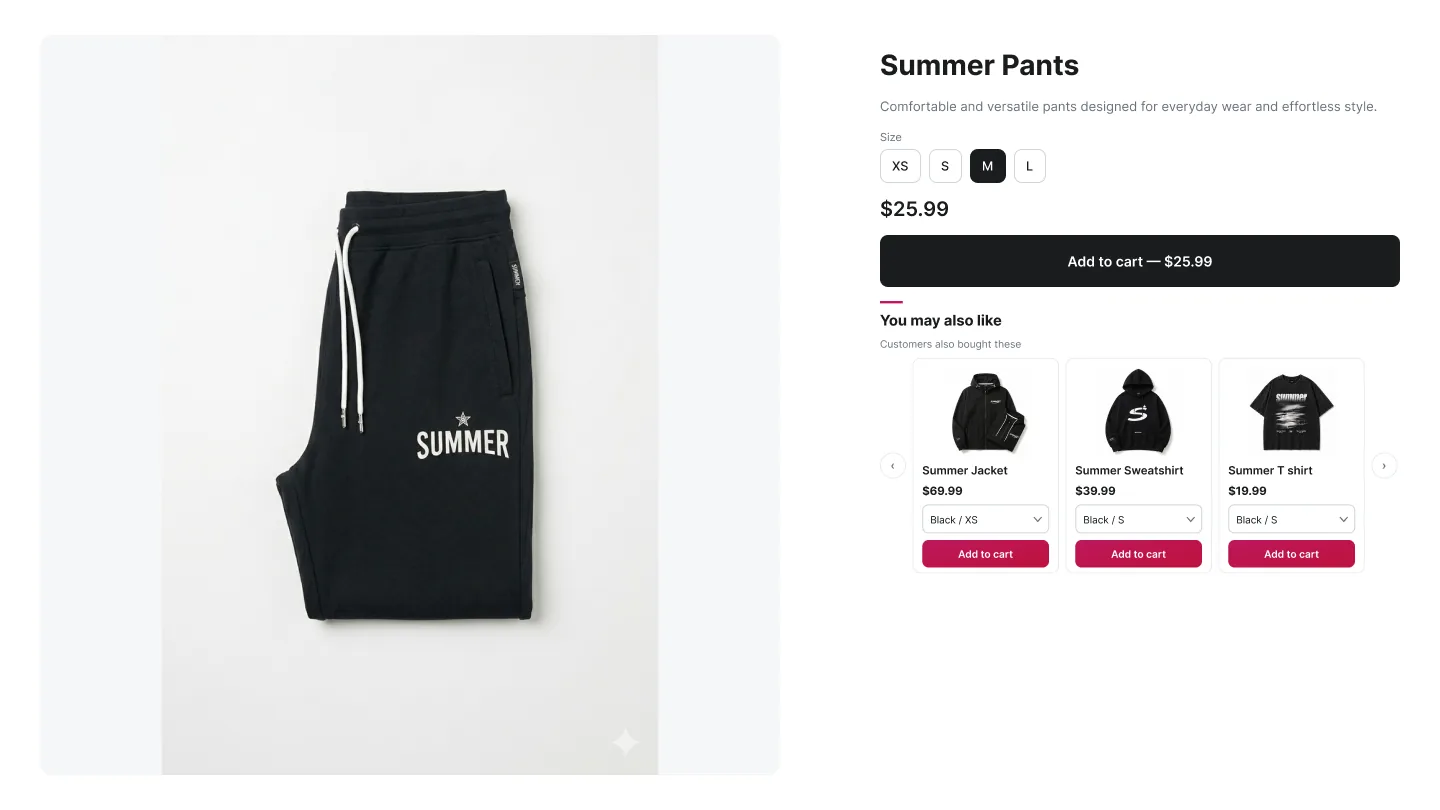
How to create a Cross-sell campaign
In the Summer Upsell admin
- 1 In the Summer Upsell admin, click Create Campaign.
- 2 Under Cross-sell on the Product Page list, pick Grid, Stack or Carousel.
- 3 Give the campaign an internal Offer name on the Offer tab.
- 4 Set the Trigger — start broad with All products if you're unsure.
- 5 Pick the Product source — Specific products for hand-curated picks, Automated recommendations for Shopify's related / complementary products (all plans), or Summer AI powered by ChatGPT (credit-based — every plan includes credits).
- 6 Optional: tick Enable discount for cross-sell products and set the display title, type and value.
- 7 Open the Design tab — pick a template, set the Subtitle and tweak typography.
- 8 On the Language tab set the Widget Title (e.g. You may also like) and Button Text, and add translations if needed.
- 9 Click Publish. The Test campaign in store checklist runs (campaign active, products available, app embed enabled, widget block added) — fix anything red, then click Publish campaign.
In the Shopify theme editor
- 1 Open Online Store → Themes → Customize.
- 2 Switch to the Products → Default product template.
- 3 Click Add block in the position you want the cross-sell to appear (typically below the buy buttons or the product description).
- 4 Pick ✨ Summer: Cross-sell from the Apps section of the block picker.
- 5 Drag to fine-tune the vertical position.
- 6 Click Save, then visit a trigger product on the storefront to confirm.
Design tab
Every campaign opens on the Offer tab. The Design tab next to it controls how the widget looks on the storefront. The same set of controls is reused across nearly every widget type, so once you learn it on one campaign the rest are familiar. A live preview on the right updates as you change settings — switch it between desktop, mobile and full size.
Tip: Click any template to seed every color at once, then nudge the individual swatches. Faster than building a palette from scratch.
Language tab
The Language tab holds the storefront copy for the widget. The Default language block is always there; click Add another language to add any locale your Shopify store has published and translate the title, button text and other storefront strings for it. Default text is pre-filled in English, Spanish, French, Arabic, Turkish and German. A locale you don't add falls back to the default language.
Tip: Start with Grid if you're not sure. It's the most flexible default and works on the majority of catalog-heavy stores. Switch to Stack if mobile is your dominant device.